
Section: A (Create first Virtual Machine)
1. Create the windows folders to house the first virtual machines and the shared storage.
F:\>mkdir RAC1
F:\>mkdir SHARED-STORAGE
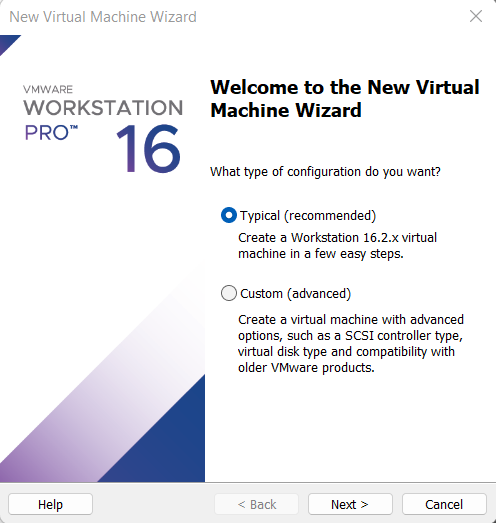
2. Open VMWARE Console and Click on New Virtual Machine and click next.
3. Select Virtual Machine Configurations: Custom
4. Choose Vm Machine Compatibility


Click on the Finish button.
Now your virtual machine is ready to install Solaris 11 OS
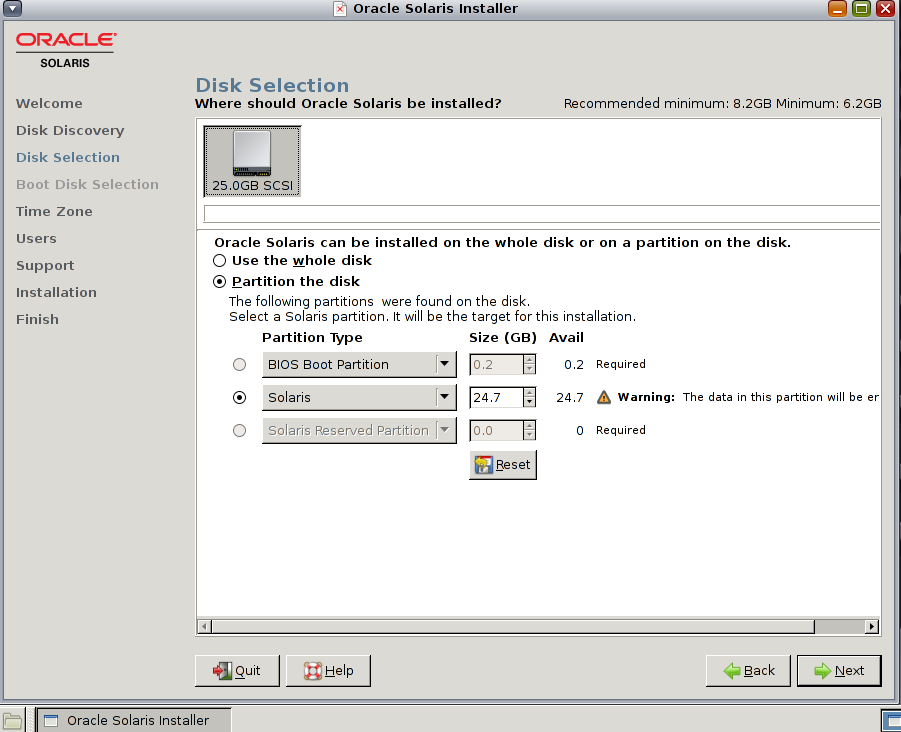
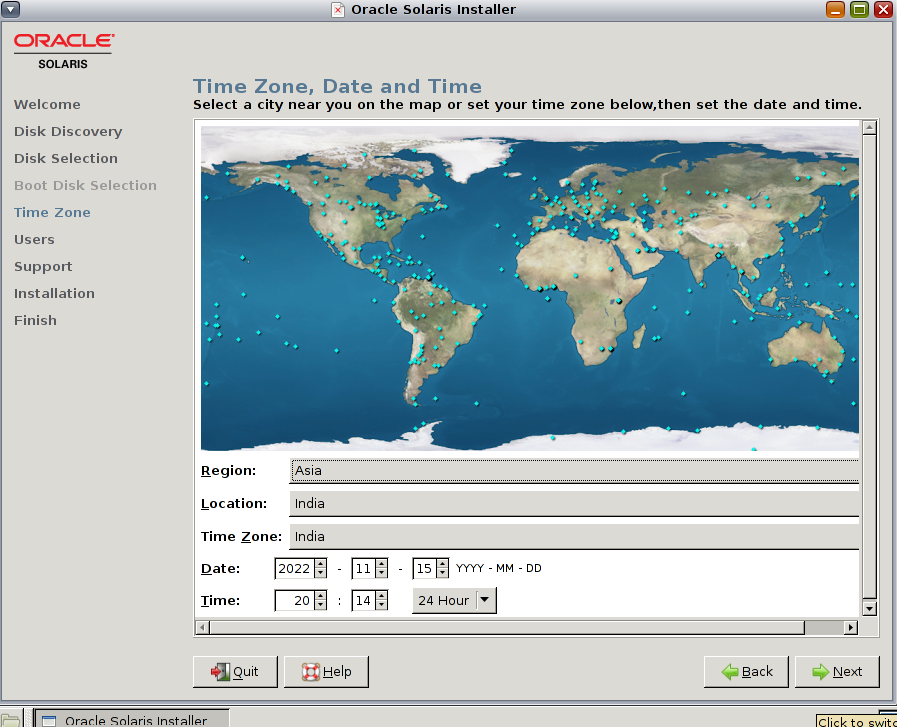
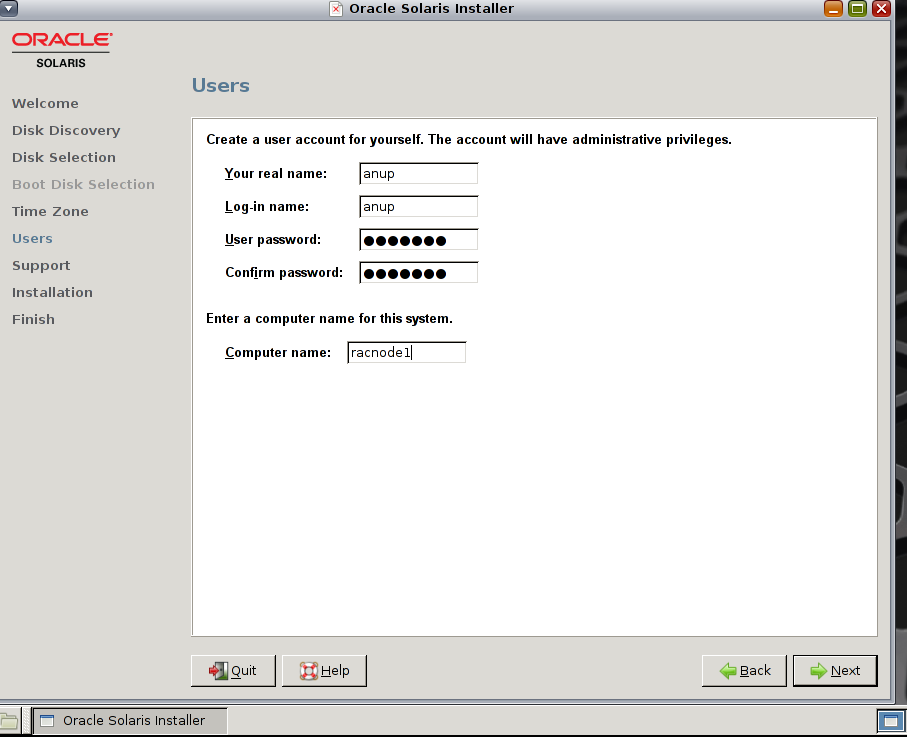
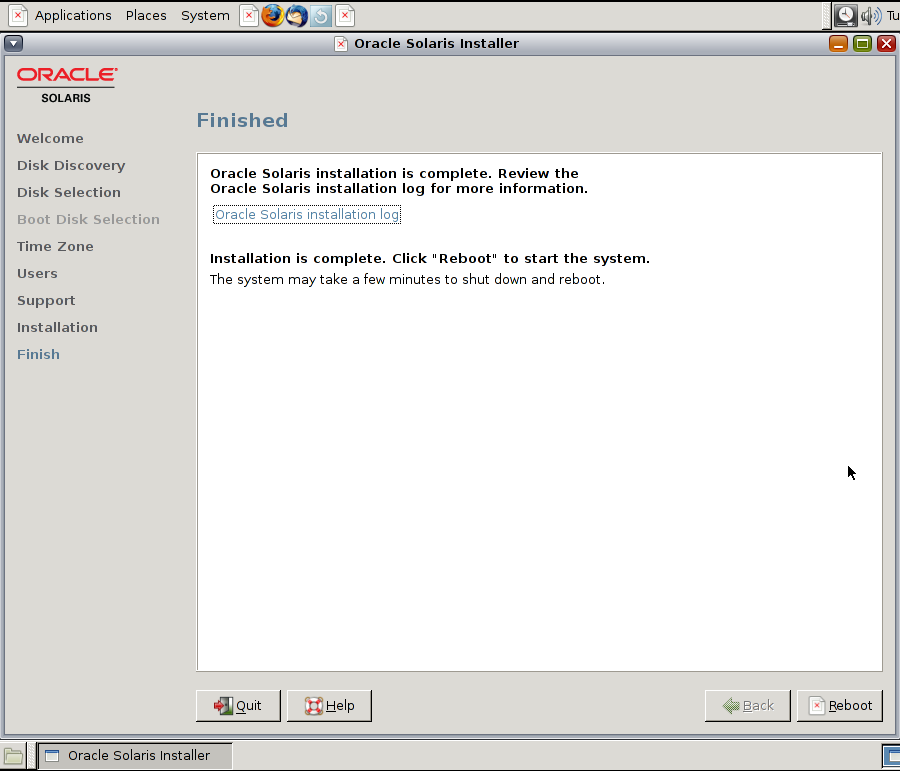
Section: B (Install Solaris 11 OS on first Virtual Machine)
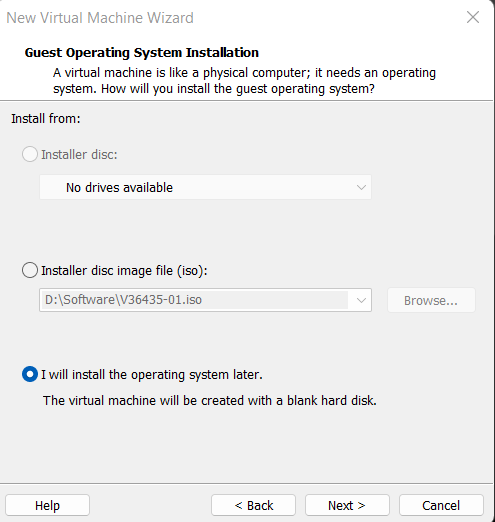
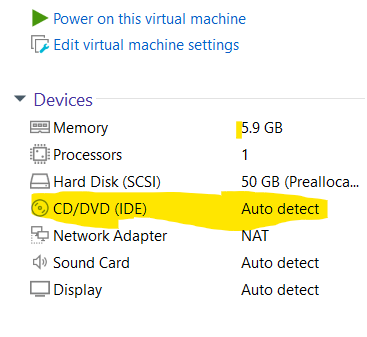
1. Double Click on CD-ROM Devices. Select Use ISO image when you planning to install OS through ISO image otherwise Use physical drive.

2. Click on Start the Virtual Machine.
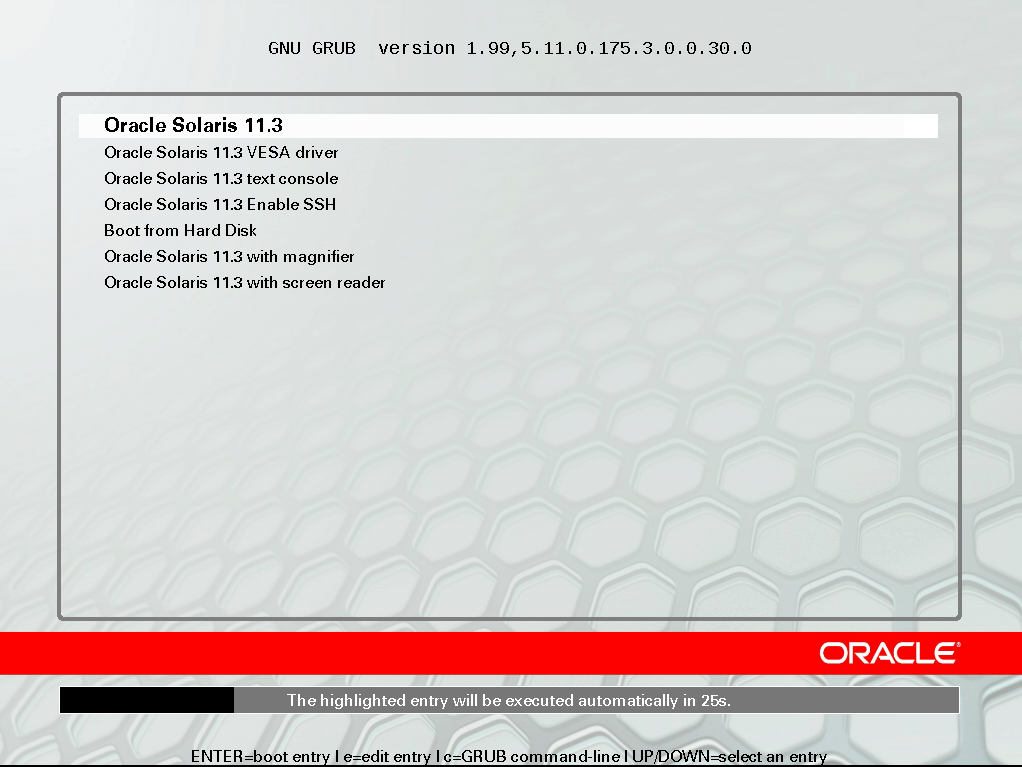
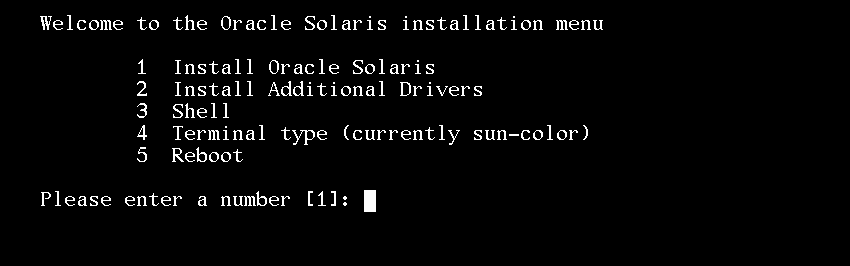
3. Select Solaris Interactive (Default) installation
GUI Installer


Test Installer


Update the packages on OS


reboot machine
Perform below steps to enable desktop GUI
# beadm create be-name
# beadm mount be-name /mnt
# pkg -R /mnt install group/system/solaris-desktop
# bootadm update-archive -R /mnt
# beadm umount be-name
# beadm activate be-name
Enable root login over SSH
vi /etc/ssh/sshd_config
Add a line in the Authentication section PermitRootLogin yes
Add network interface for private connectivity
1. Click on Edit virtual machine setting
2. Click Add button and select Ethernet Adapter
3. Select NAT Network type
Reboot Machine
Start the Machine and configure network settings.
Perform below steps to configure network interface
to get installed ethernet details
ipadm show-addr

Delete interface
ipadm delete-addr net0/v4
ipadm delete-addr net0/v6
Create private interface
ipadm create-ip net1
Configure public and private interface
ipadm create-addr -T static -a 192.168.157.111/24 net0/v4
ipadm create-addr -T static -a 192.168.157.11/22 net1/v4
Verify the both public and private interface
ipadm show-addr

Reboot Machine
validate and Change Hostname on machine
To list the current hostname
svccfg -s system/identity:node listprop config
config application
config/enable_mapping boolean true
config/ignore_dhcp_hostname boolean false
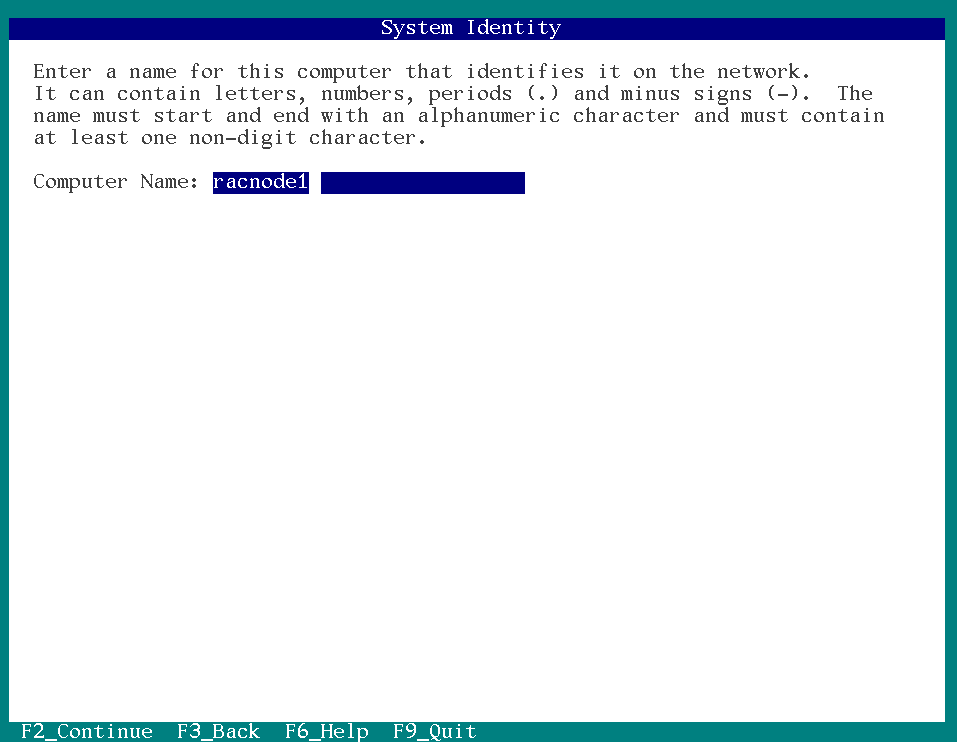
config/nodename astring racnode1
config/loopback astring racnode1
To set nodename and loopback machine
svccfg -s system/identity:node setprop config/nodename="racnode1"
svccfg -s system/identity:node setprop config/loopback="racnode1"
svcadm refresh system/identity:node
svcadm restart system/identity:node
svccfg -s system/identity:node listprop config
Power off machine
Section: C (Create Shared Storage and Configure)
►Create virtual disks for storage usage, which is shared by Both Machine
1. down the virtual Machine (RAC1)
2. Go to VMware Server Console. Click on Edit virtual machine settings.
Virtual Machine Settings: Click on Add.
Add Hardware Wizard: Click on Next.
Hardware types: Select Hard Disk.
Select a Disk:
Disk: Select create a new virtual disk.
Select a Disk Type:
Virtual Disk Type: Select IDE (Recommended).
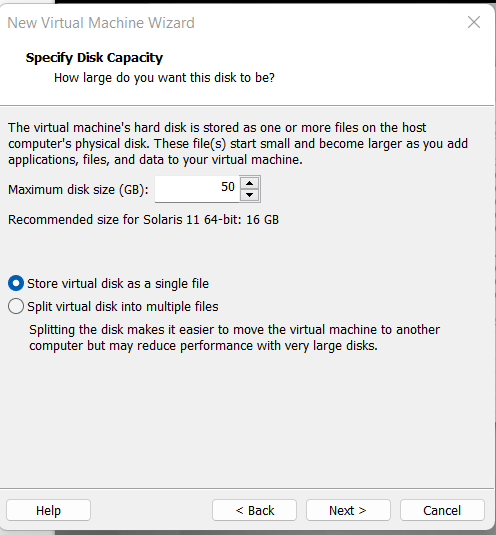
Specify Disk Capacity:
Disk capacity: Enter “10GB.”
Select Allocate all disk space now.
Specify Disk File:
Disk file: Enter “F :\> SHARED-STORAGE\DISK1.vmdk.”
Click on Advanced
Add Hardware Wizard:
Virtual device node: Select IDE0.1.
Mode: Select Independent, Persistent for all shared disks.
3. Click on Finish.
► Modify virtual machine configuration file.
Additional parameters are required to enable disk sharing between the two virtual RAC nodes. Open the configuration file, F:\>SUNOS-1\ Solaris 10.vmx.vmx and add the bold parameters listed below.
.
.
.
priority.grabbed = "normal"
priority.ungrabbed = "normal"
disk.locking = "FALSE"
diskLib.dataCacheMaxSize = "0"
ide0:1.sharedBus = "virtual"
ide0:0.redo = ""
ethernet0.addressType = "generated
-
-
-
-
-
ethernet0.connectionType = "hostonly"
ide0:1.present = "TRUE"
ide0:1.fileName = "E:\SHARED-DISK.vmdk"
ide0:1.redo = ""
checkpoint.vmState = ""
ide0:1.mode = "independent-persistent"
scsi0:1.deviceType= "disk"
disk.locking = "FALSE"
diskLib.dataCacheMaxSize = "0"
scsi0:1.sharedBus = "virtual"
floppy0.present = "FALSE"
Save it.
Section: E (Create Second Virtual Machine)
1. Create the windows folders to house the second virtual machines.
E:\>mkdir RAC2
2. Shutdown the First Virtual Machine
3. Copy all the files from F:\RAC1 to E:\RAC2
4. Open VMware Server Console, press CTRL-O to open the second virtual machine, E:\RAC2\Solaris 10.vmx.
5. Rename the second virtual machine name from RAC1 to RAC2.
Click on Start this virtual machine to start RAC2, leaving RAC1 powered off.
RAC2 – Virtual Machine: Select create a new identifier.
Start Second Machine
Configure network/Domain on Second Machine
Start the second Machine only and configure network settings on second machines.
Perform below steps on second node:
to get installed ethernet details
ipadm show-addr
Delete interface
ipadm delete-addr net0/v4
ipadm delete-addr net1/v4
Configure public and private interface
ipadm create-addr -T static -a 192.168.157.222/24 net0/v4
ipadm create-addr -T static -a 192.168.157.22/22 net1/v4
Verify the both public and private interface
ipadm show-addr
Change Hostname on second machine
To list the current hostname
svccfg -s system/identity:node listprop config
config application
config/enable_mapping boolean true
config/ignore_dhcp_hostname boolean false
config/nodename astring racnode1
config/loopback astring racnode1
To set nodename on second machine
svccfg -s system/identity:node setprop config/nodename="racnode2"
svccfg -s system/identity:node setprop config/loopback="racnode2"
svcadm refresh system/identity:node
svcadm restart system/identity:node
svccfg -s system/identity:node listprop config
Section: F (Create Internal Storage for /oracle mount point )
1. down the virtual Machine (RAC1)
2. Go to the VMware Server Console. Click on Edit virtual machine settings.
Virtual Machine Settings: Click on Add.
Add Hardware Wizard: Click on Next.
Hardware types: Select Hard Disk.
Select a Disk:
Disk: Select create a new virtual disk.
Select a Disk Type:
Virtual Disk Type: Select IDE (Recommended).
Specify Disk Capacity:
Disk capacity: Enter “25GB.”
Select Allocate all disk space now.
Specify Disk File:
Disk file: Enter “F :\> RAC1\DISK1.vmdk.”
3. Click on Finish.
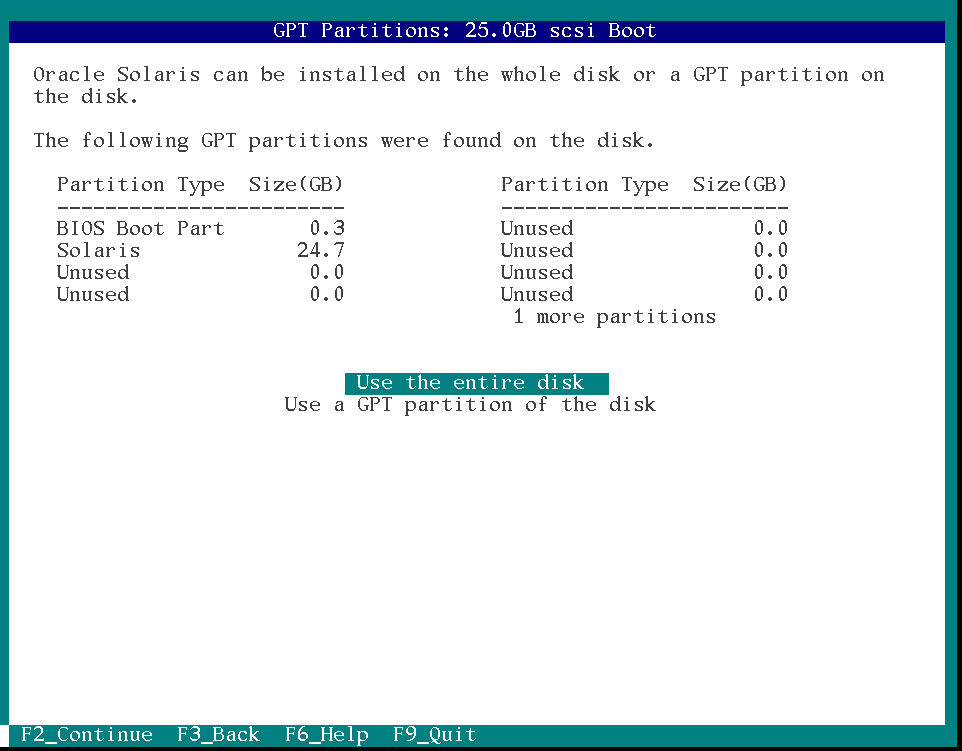
4. Create Partition and mount point
Start First / Second Machine
Create Domain name on Both node
Create or edit a file called /etc/defaultdomain and add the single entry:
$vi /etc/defaultdomain
indiandba.com
Execute the domainname command to set the domain as follows:
$domainname ‘cat /etc/defaultdomain’
Put the following entry in /etc/hosts file on Both Node.
192.168.157.111 racnode1.indiandba.com racnode1
192.168.157.222 racnode2.indiandba.com racnode2
192.168.157.11 racnode1-priv.indiandba.com racnode1-priv
192.168.157.22 racnode2-priv.indiandba.com racnode2-priv
192.168.157.50 racnode1-vip.indiandba.com racnode1-vip
192.168.157.60 racnode2-vip.indiandba.com racnode2-vip
192.168.157.20 scan.indiandba.com
192.168.157.30 scan.indiandba.com
192.168.157.40 scan.indiandba.com
Section H (Create Oracle User and Group)
Step 1 Create Oracle Users and Group (in all Nodes)
Log in as a root and execute:
# groupadd oinstall
# groupadd dba
# mkdir -p /export/home/oracle
# useradd -d /export/home/oracle -g oinstall -G dba oracle
# chown oracle:dba /export/home/oracle
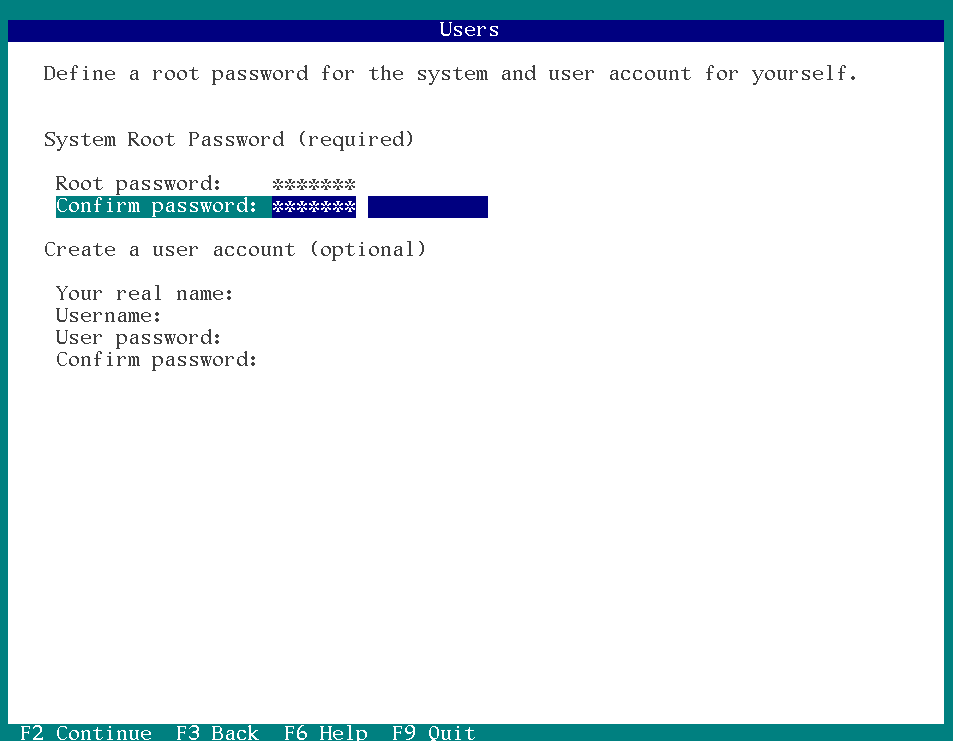
# passwd oracle
New Password:
Re-enter new Password:
passwd: password successfully changed for oracle
Section: G (Prepare Disk for OCR, Voting and ASM Storage)
1. Run below mention command on first node
$devfsadm
2. Log on to RAC1 node and complete bellow mention procedure.
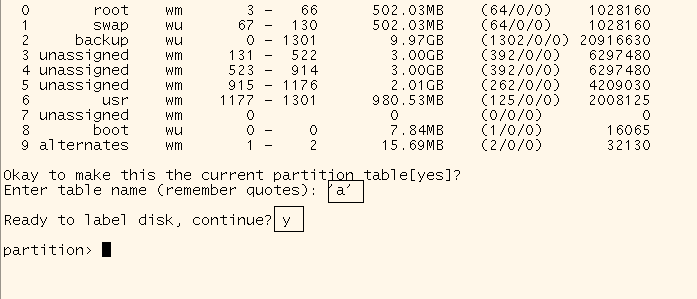
Here we will create following partition:
c0d1s0 for OCR Disk
c0d1s1 for Voting Disk
c0s1s3 form ASM Disk
c0s1s4 from ASM Disk
c0s1s5 from ASM Disk
3. Complete bellow mention steps for creating partition
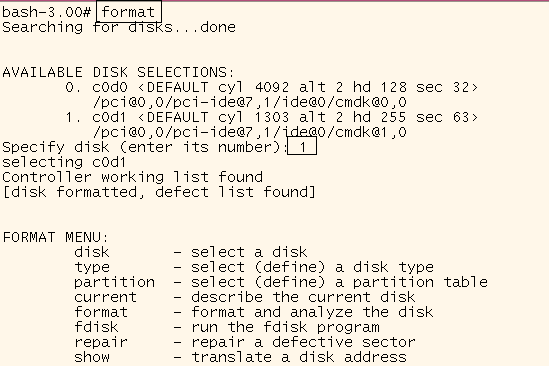
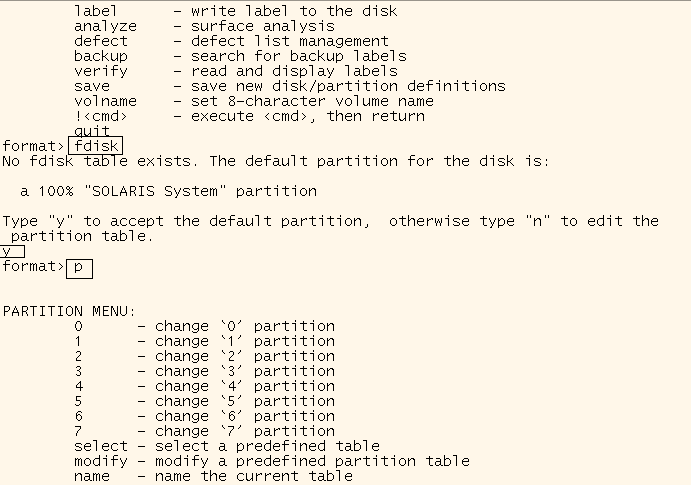
$format

4. Set ownership of Disk (Note: This will be done after creating Oracle user and dba group)
Default owner is root:sys needs to be changed to oracle:dba .We need to set oracle:dba ( here oracle is a Oracle owner and dba is a group) ownership of the disk.
Check ownership of Disk. Execute following command for all slice as a root user.
Example:
$ ls -lhL /dev/rdsk/c0d1s0
crw-r----- 1 root sys 118, 64 Feb 16 02:10 /dev/rdsk/c0d1s0
$ chown oracle:dba /dev/rdsk/c0d1s0
Section H (Configure SSH)
Step 1 Create .SSH, and Create RSA Keys on Each Node
Log in as an Oracle/CRS user and execute bellow steps
$ mkdir ~/.ssh
$ chmod 700 ~/.ssh
$ cd .ssh
$ /usr/bin/ssh-keygen -t rsa
At the prompts:
Accept the default location for the key file (press Enter).
Enter and confirm a pass phrase unique for this installation user.
Step 2 Add All Keys to a Common authorized_keys File
On the primary node (RAC1), change directories to the .ssh directory. Then, add the RSA key to the authorized_keys file.
$ cd .ssh
$ cat id_rsa.pub >> authorized_keys
$ ls
In the .ssh directory, you should see the id_rsa.pub keys that you have created, and the file authorized_keys.
Step 3 Copy authorized_key file to all cluster node (RAC2)
$ scp authorized_keys RAC2:/export/home/oracle/.ssh/
The authenticity of host 'rac2 (192.168.0.222)' can't be established.
RSA key fingerprint is c0:1f:20:34:54:b2:cd:9f:42:f2:d6:25:36:2f:3e:db.
Are you sure you want to continue connecting (yes/no)? yes
Warning: Permanently added 'rac2,192.168.0.222' (RSA) to the list of known hosts.
Password:
authorized_keys 100% |*****************************| 221 00:00
Step 4 Log in on second node (RAC2) and Add the RSA keys for the second node (RAC2) to the authorized_keys file:
$cd .ssh
$cat id_rsa.pub >> authorized_keys
Step 5 Copy authorized_key file to all cluster node (RAC2)
$ scp authorized_keys RAC1:/export/home/oracle/.ssh/
Step 6 Enabling SSH User Equivalency on Cluster Member Nodes. On the system where you want to run OUI, log in as the ORACLE/CRS user and execute:
$ ssh RAC1 date
$ ssh RAC2 date
$ ssh RAC1-PRIV date
$ ssh RAC2-PRIV date
Section I (Configure DNS Client)
(Optional Steps)
DNS Server IP : 192.168.157.10
Domain Name : indiandba.com
1. Prepare a list of domains to search and the IP addresses of the DNS name servers on your network.
$ svccfg -s network/dns/client
svc:/network/dns/client> setprop config/search = astring: ("domain1" "domain2")
svc:/network/dns/client> setprop config/nameserver = net_address: (address1 address2)
domain* refers to domain names such as example.com, sales.my-example.com, and so on. address* are IP addresses of your DNS servers.
svc:/network/dns/client> select network/dns/client:default
svc:/network/dns/client:default> refresh
svc:/network/dns/client:default> validate
2. Specify the name service switch to use DNS.
svc:/network/dns/client:default> select name-service/switch
svc:/system/name-service/switch> setprop config/host = astring: "files dns"
svc:/system/name-service/switch> select system/name-service/switch:default
svc:/system/name-service/switch:default> refresh
svc:/system/name-service/switch:default> validate
svc:/system/name-service/switch:default> quit
3. Start the services that are needed to run the DNS client
$ svcadm enable dns/client
$ svcadm enable name-service/switch
Validate /etc/resolv.conf
Solaris & Scripting: Configure DNS in Solaris 11 (solaris-scripting-judi.blogspot.com)
Section C (Specify default gateway)
specifying the default gateway to some dummy ip address (same subnet) in both virtual machines.
$ vi /etc/defaultrouter and add the IPADDRESS of your router.
EXAMPLE:
vi /etc/defaultrouter
192.168.157.100
reboot to test. or netstat -r (This will show the current routing table)
Another Example: route add destination gateway
Example:
netstat –r (This will now show your 'new' default gateway).
Post a Comment