Now Start the Oracle ClusterWare Installation.
Step 1 Start run installer.
#./runInstaller
If you see any error (PRKC-1044) regarding SSH. Please use bellow mention solution.
Solution 1: you can use the bello mention command.
# ./runInstaller –remoteshell /usr/bin/ssh
Solution 2(permanent Solution): Complete below mentioned steps.
#go to /usr and make directory “local” and go to local directory and create directory “bin”
#create symbolic link
#ln –s /usr/bin/ssh /usr/local/bin/ssh
#ln –s /usr/bin/scp /usr/local/bin/scp
Step 2 Specify Inventory directory and credentials
Step 3 Specify CRS Home and Path Details

Step 4 Installer Check pre-request. (This will show two warning, leave it)

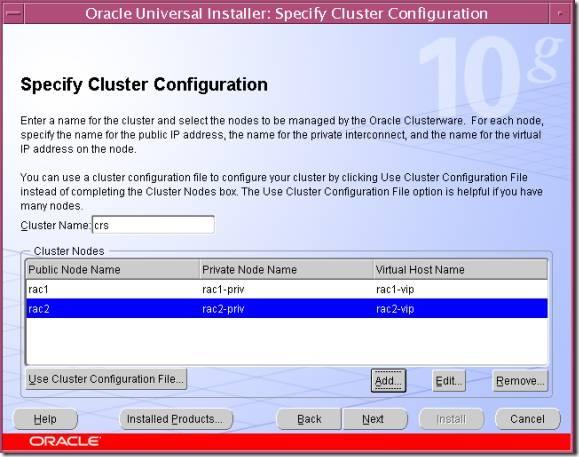
Step 5 Specify cluster configuration. Click on Add button and specify public node name, private node name and virtual node name details for all RAC nodes.
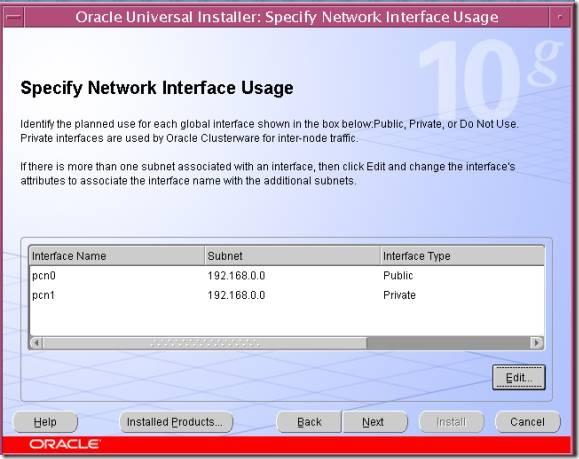
Step 6 Specify network interface usage. At least one interface (pcn0) should be public.
Step 7 Specify OCR locations

Step 8 Specify Voting Disk locations (Choose External Redundancy /dev/rdsk/c0d1s1)
Step 9 Click on Install button.
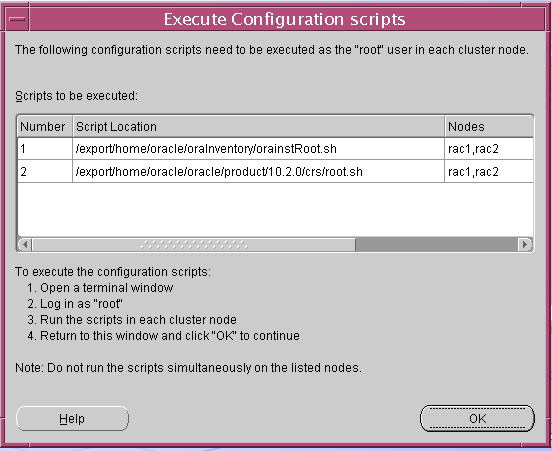
Step 10 you need to execute scripts as root user, which will be appearing in screen.
Note:
When you will execute “ROOT.SH” script on second node (RAC2), it will run VIPCA in silent mode and configure VIP.
We can also run the following Command in Second node as root user. $CRS_HOME/bin/vipca for configuring VIP
Step 11Verify status of CRS services. Execute bellow command:
$/export/home/oracle/oracle/product/10.2.0/crs/bin/crs_stat –t
OR
$ srvctl status nodeapps -n rac1
$ srvctl status nodeapps -n rac2
Post a Comment