We can use two methods “DBCA” or “Manual”, for creating ASM Instance and Disk group. Here I will describe both methods. You can choose one of them.
By “DBCA”
Step 1 log in as a ORACLE user , set following environment and invoke DBCA :
$export ORACLE_HOME=/export/oracle/oracle/product/10.2.0/db
$export PATH=$ORACLE_HOME/bin:$PATH
$dbca
Step 2 Choose oracle RAC database configurations.
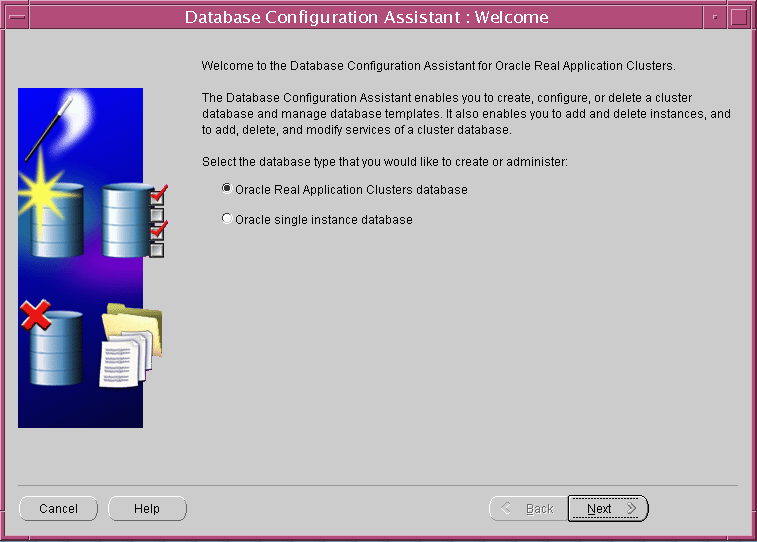
Step 3 Choose “Configure Automatic Storage Management”

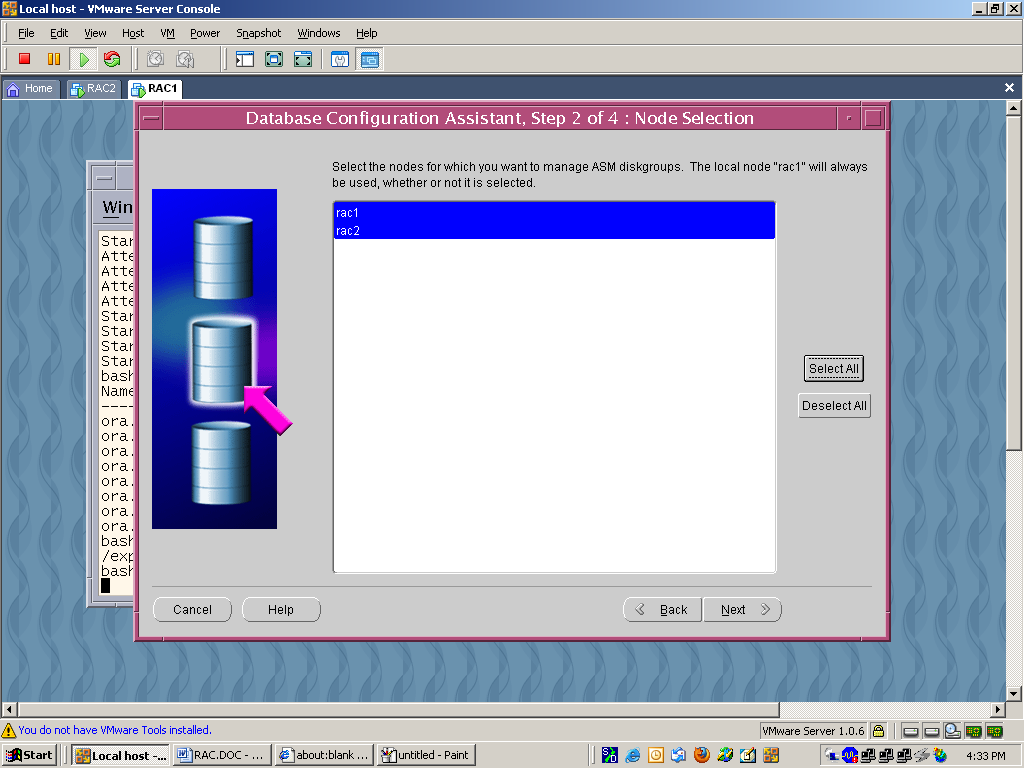
Step 4 Choose BOTH NODE.
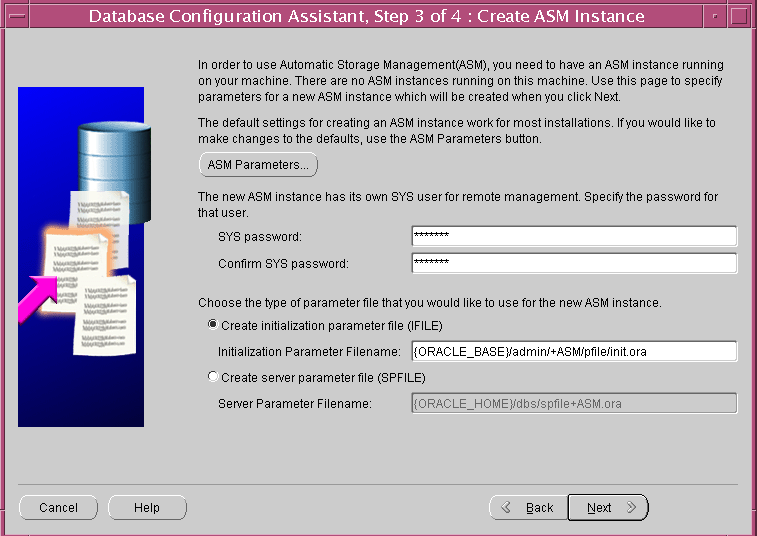
Step 5 Choose As per screen Shot
Step 6 Clicks on Create New.

Step 7 Create Disk Group as per screen shot.

Step 8 Choose As per screen Shot. Create Disk Group as per screen shot.

Step 9 oracle Automatically create ASM, ASM Disk group and mount the Instance and Disk group on both node.
Step 10 Verify status of services.
$/export/home/oracle/oracle/product/10.2.0/crs/bin/crs_stat –t
By “MANUAL”
Step 1 Create parameter files (int+ASM1.ora) for ASM instance on the first node.
Create init+ASM1.ora file for ASM Instance and put it default location.
Cluser_database=true
asm_diskgroups='DATA',‘RECOVERY’
#asm_diskstring='/dev/rdsk/c0d1s*'
background_dump_dest=/export/home/oracle/oracle/admin/+ASM/bdump
core_dump_dest==/export/home/oracle/oracle/admin/+ASM/cdump
user_dump_dest==/export/home/oracle/oracle/admin/+ASM/udump
instance_type=asm
large_pool_size=16M
remote_login_passwordfile=exclusive
+ASM1.instance_number=1
+ASM2.instance_number=2
Step 2 Create password file for the ASM instance on first node. Using the orapwd utility, create an orapw+ASM1 file in $ORACLE_HOME/dbs on the second node.
$orapwd file=orapwd+ASM1 password=sys entries=5
Step 3 Start the first ASM instance (+ASM1).
$ export ORACLE_SID=+ASM1
$ sqlplus / as sysdba
SQL*Plus: Release 10.2.0.2.0 - Production on Thu Oct 26 18:43:14 2009
Copyright (c) 1982, 2004, Oracle. All rights reserved.
Connected to an idle instance.
SQL> startup nomount
ASM instance started
Total System Global Area 125829120 bytes
Fixed Size 769268 bytes
Variable Size 125059852 bytes
Database Buffers 0 bytes
Redo Buffers 0 bytes
ORA-15110: no diskgroups mounted
SQL>
Step 4 create Disk Group
SQL> create diskgroup DATA normal redundancy
failgroup one disk '/dev/rdsk/c0d1s3'
failgroup two disk '/dev/rdsk/c0d1s4';
Diskgroup created.
SQL> create diskgroup RECOVERY external redundancy disk '/dev/rdsk/c0d1s5';
Diskgroup created.
Step 5 Create parameter files (int+ASM2.ora) for ASM instance on the second node.
Create init+ASM1.ora file for ASM Instance and put it default location.
Cluser_database=true
asm_diskgroups='DATA',‘RECOVERY’
#asm_diskstring='/dev/rdsk/c0d1s*'
background_dump_dest=/export/home/oracle/oracle/admin/+ASM/bdump
core_dump_dest==/export/home/oracle/oracle/admin/+ASM/cdump
user_dump_dest==/export/home/oracle/oracle/admin/+ASM/udump
instance_type=asm
large_pool_size=16M
remote_login_passwordfile=exclusive
+ASM1.instance_number=1
+ASM2.instance_number=2
Step 6 Create password file for the ASM instance on second node. Using the orapwd utility, create an orapw+ASM2 file in $ORACLE_HOME/dbs on the second node.
$orapwd file=orapwd+ASM2 password=sys entries=5
Step 7 Start the second ASM instance (+ASM2).
$ export ORACLE_SID=+ASM2
$ sqlplus / as sysdba
SQL*Plus: Release 10.2.0.2.0 - Production on Thu Oct 26 18:43:14 2009
Copyright (c) 1982, 2004, Oracle. All rights reserved.
Connected to an idle instance.
SQL> startup nomount
ASM instance started
Total System Global Area 125829120 bytes
Fixed Size 769268 bytes
Variable Size 125059852 bytes
Database Buffers 0 bytes
Redo Buffers 0 bytes
ORA-15110: no diskgroups mounted
SQL>
Step 8 Register the ASM instances with CRS.
For higher availability, register the ASM instances with the CRS. When registered, the CRS should detect any failed instances and automatically attempt to start up the instances. The CRS should also automatically start up the instances when the servers are rebooted.
On node RCA1:
$ srvctl add asm -n rac1 -i +ASM1 -o /export/home/oracle/oracle/product/10.2.0/db
$ srvctl start asm -n rac1
$ srvctl status asm -n rac1
ASM instance +ASM1 is running on node rac1.
On node RAC2:
$ srvctl add asm -n rac2 -i +ASM2 -o /export/home/oracle/oracle/product/10.2.0/db
$ srvctl start asm -n rac2
$ srvctl status asm -n rac2
ASM instance +ASM2 is running on node rac2.
Post a Comment